How to run the review
Sit with the client (in person or on a call) and walk through each section of the proposal summary in order. Ask: Is this what you want? Does it match the goals from Step 1 — Start here?
If you offer more than one design, the proposal compares them side by side — as in the example below (solar-only vs solar + battery). Help the client choose, or agree to adjust a design and re-price before they sign off.
The screenshots are from a real Photonik proposal export. Your client’s numbers, currency, and page order will match their design.
Proposal summary
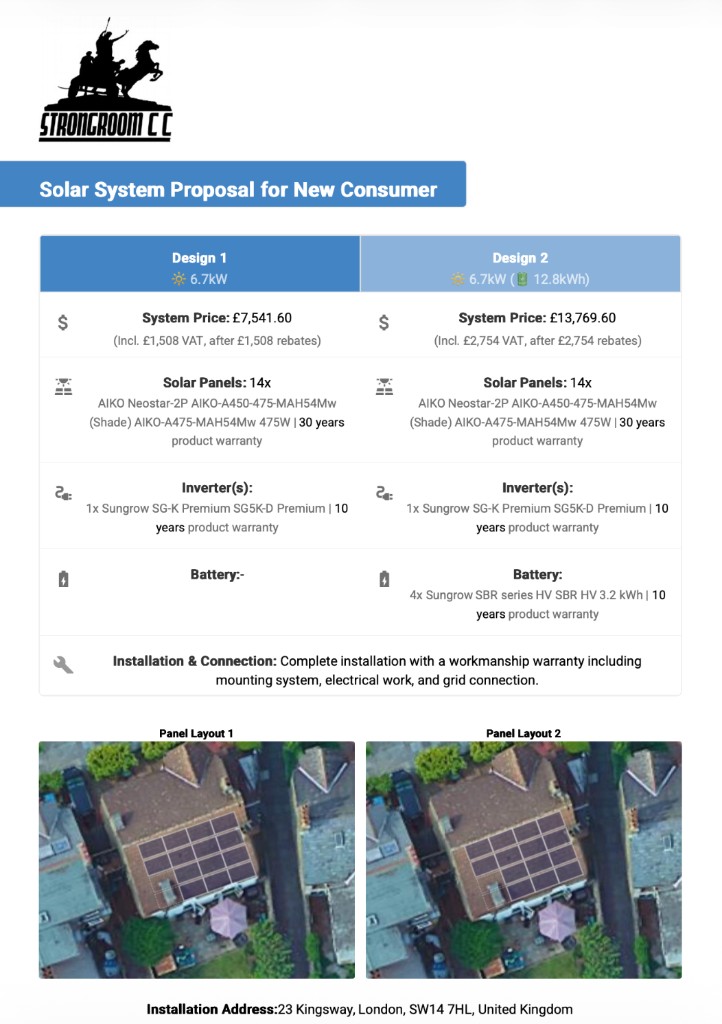
Start here: headline price, equipment list, warranties, and the panel layout on the roof.
- Confirm the system size, panel model, inverter, and battery (if any) match what you discussed.
- Check the roof layout with the client — array size, orientation, and any compromises from Steps 4–5.
- Make sure the headline price matches what you built in Costs & Pricing.
Energy details
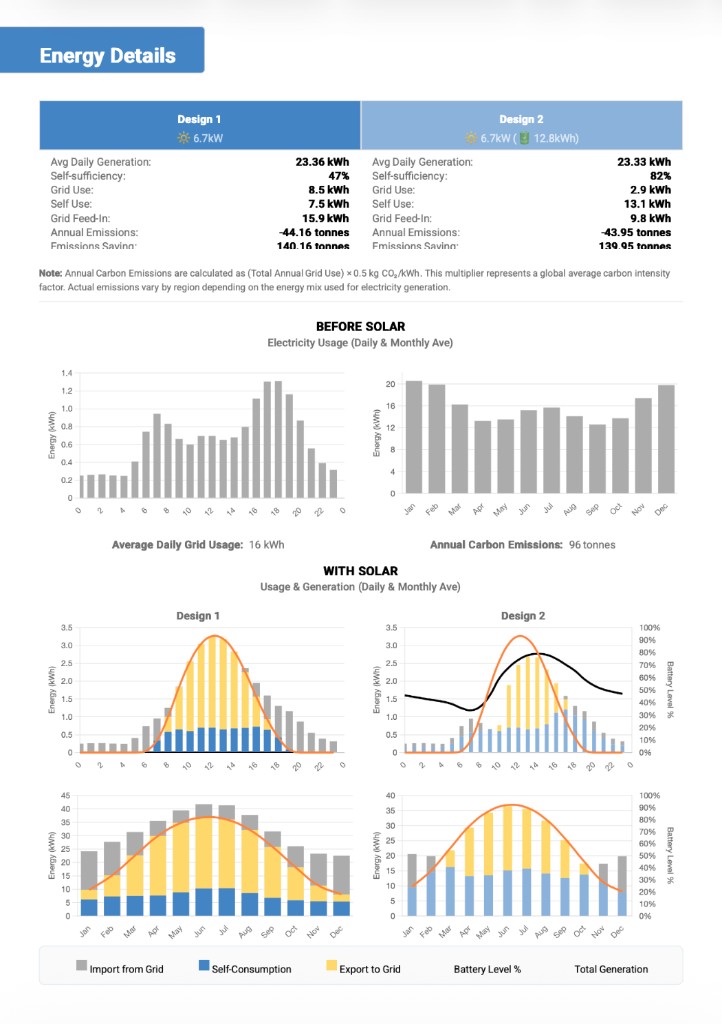
Does the design actually meet their usage?
- Compare average daily generation to how much they use (from Step 3 — Energy Profile).
- Check self-sufficiency, grid import, self-use, and export — especially whether a battery shifts evening use the way they expect.
- Use the before/after charts to sense-check daily and seasonal shape, not just annual totals.
If off-grid: confirm the load table is accurate and average daily generation covers the load in the worst month before the client signs off.
Electricity bill savings
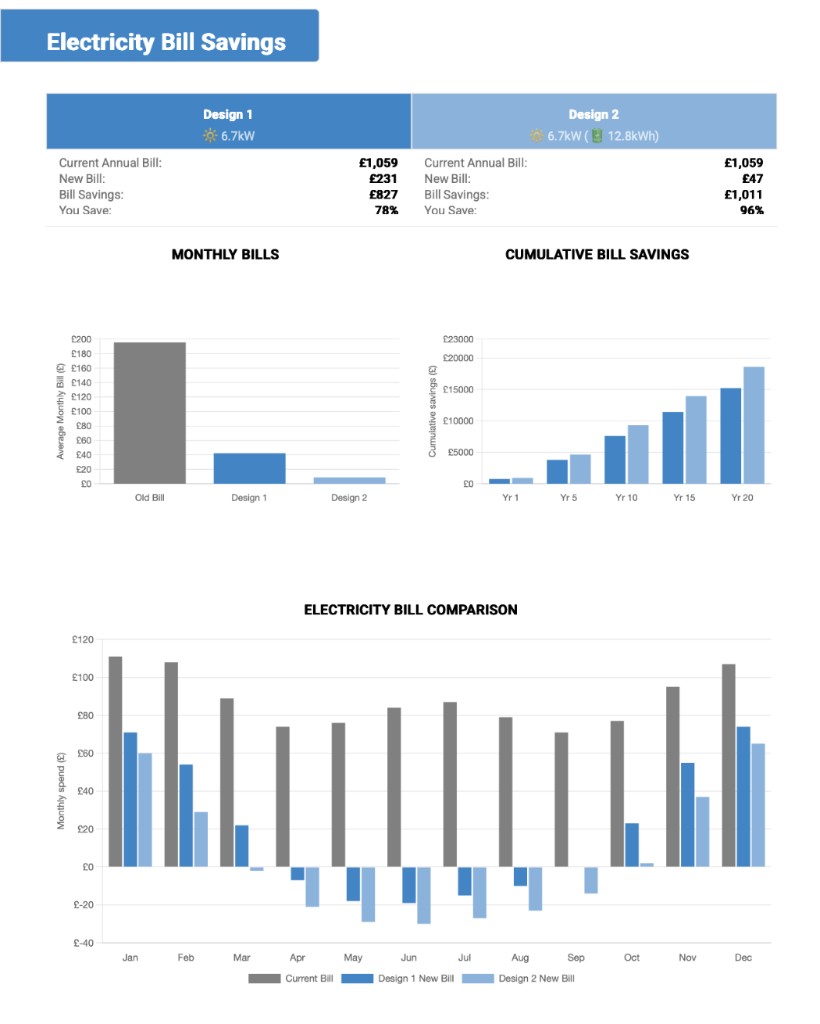
Translate the engineering into money on their bill.
- Walk through current bill vs new bill and the percentage saved.
- Use the monthly bill chart to show summer export vs winter import.
- The cumulative savings chart shows the long-term benefit — useful when the upfront price feels high.
These figures depend on accurate usage and tariff inputs. If the numbers look wrong, check Step 3 — Energy Profile before you walk the client through the bill.
If off-grid: focus on diesel or generator offset and autonomy, not feed-in revenue.
Financial summary
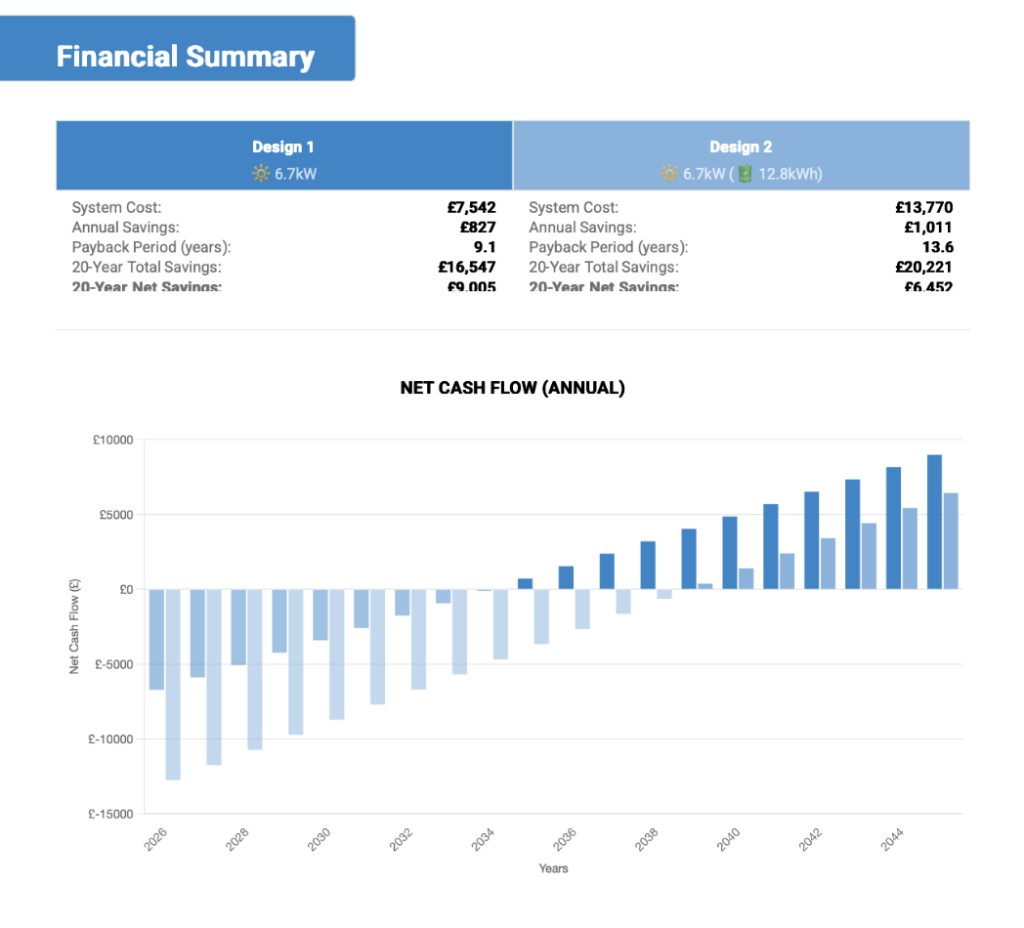
Payback and long-term outcomes — explain the assumptions, not just the headline numbers.
- Payback period — how many years until cumulative savings cover the system cost.
- 20-year total and net savings — a battery can improve bills but lengthen payback if it adds a lot of cost; talk that through honestly.
- The net cash flow chart shows the year-by-year picture — when the line crosses zero, the system has paid for itself.
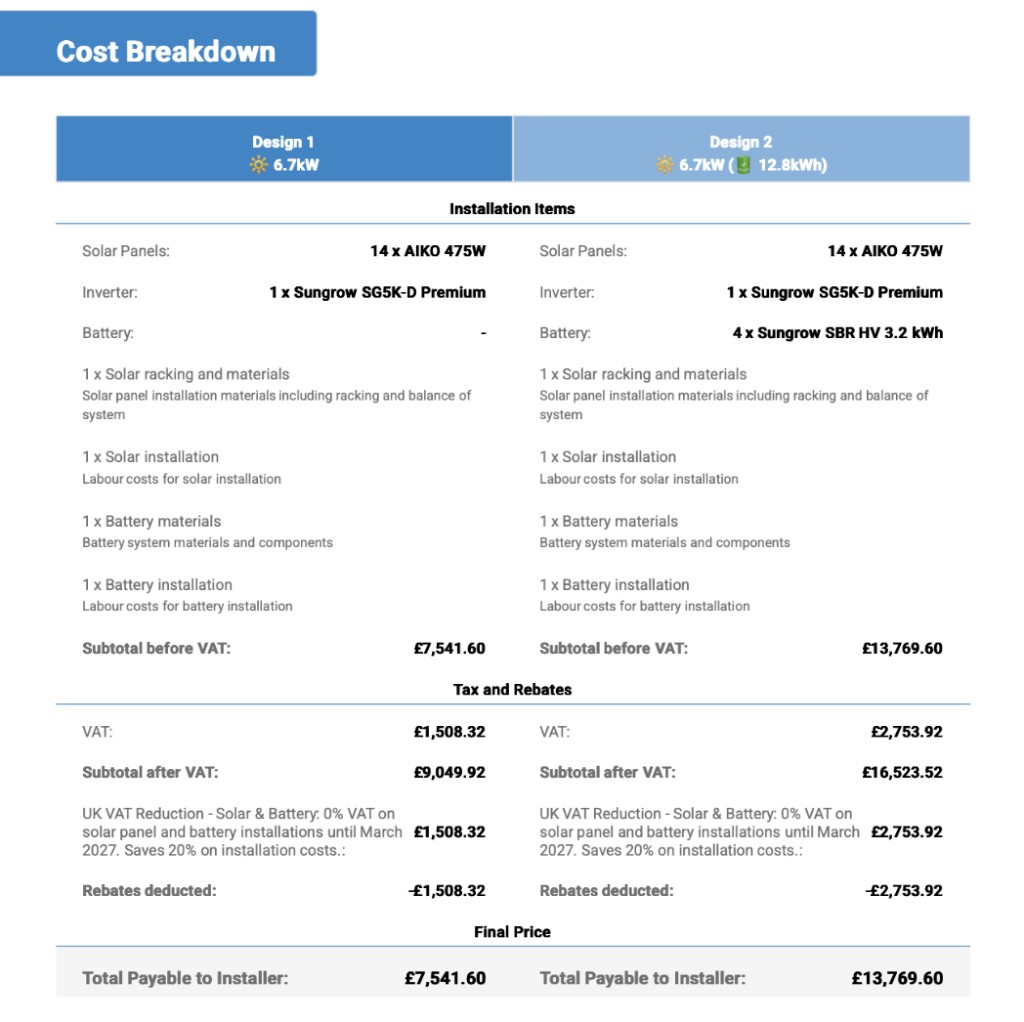
Cost breakdown
Transparent pricing from Step 9 — equipment, labour, tax, rebates, and the final total.
- Walk line items if the client asks where the money goes.
- Show how tax and rebates are applied so nothing feels hidden.
- Confirm the total payable matches the headline price on the summary page.
Site plan, about us, and share
Most proposals also include a site plan (panel positions, equipment locations, cable runs) and standard about us / terms pages. Review the site plan with the client here — the same layout becomes part of the install handover in Step 11 once they agree.
In Photonik Pro, use Share on the proposal summary to send a link or PDF when the client is ready to review on their own.
Before step 11
- Note any design tweaks the client wants and re-price in Costs & Pricing if needed.
- When design, savings, and price are agreed, continue to Step 11 — Documentation and handover.